MxMo XCIX – Ice Baby!
MxMo XCIX – Ice Baby!
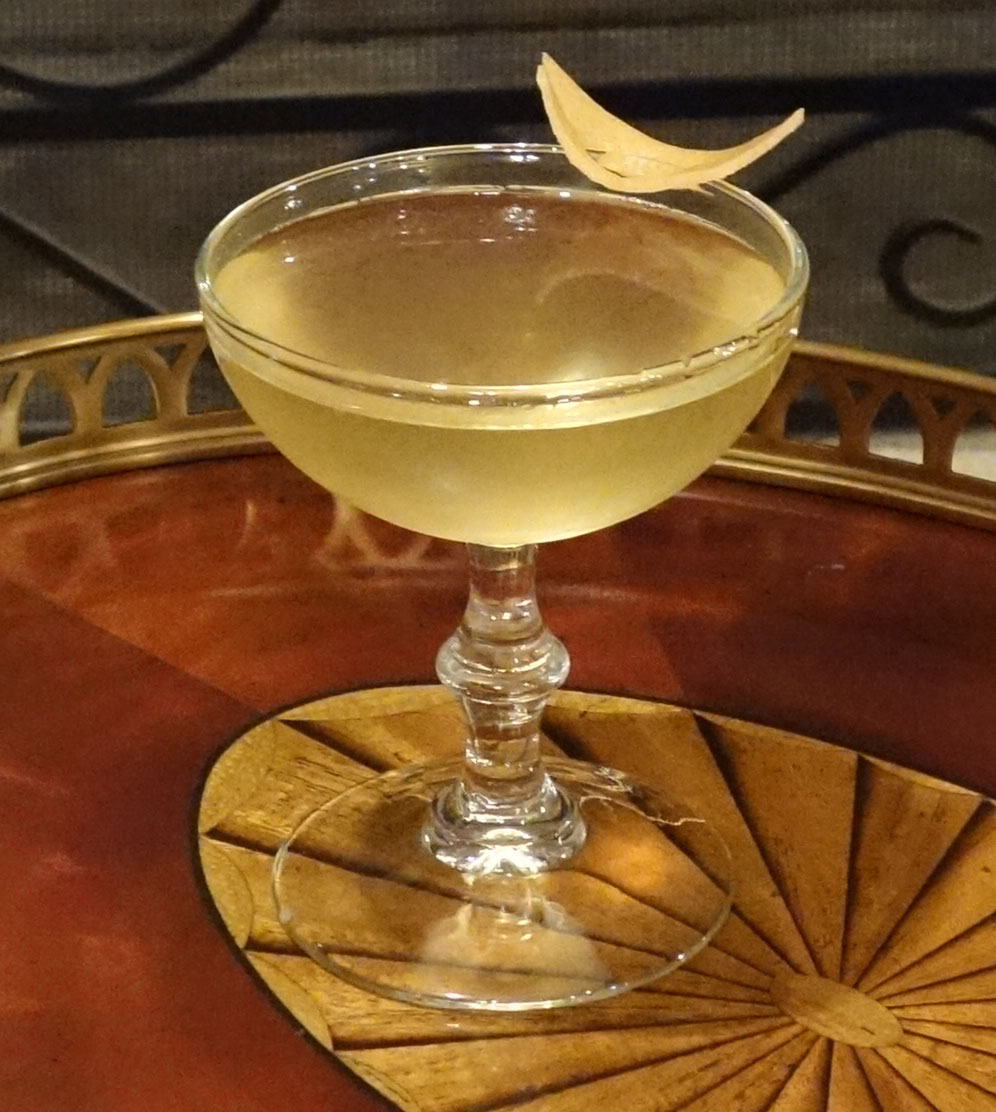
I though I’d take this opportunity to discuss my favorite toy, er, tool. The ice sphere maker.
Making Clear Ice at Home

Bottom line, a lot of trouble for little reward. You can easily make clear ice in small quantities. But for entertaining, it’s not practical. I know that in San Antonio, we can purchase large, clear ice cubes for as little as 35₵ each. Nevertheless, if you want something for a small, intimate occasion, here’s a fairly simple method.
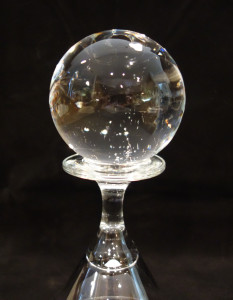
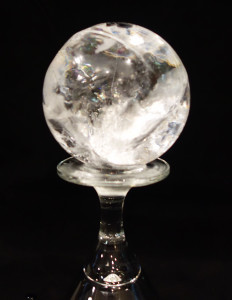
Other than a few bubbles in the bottom, this is a clear ice sphere.
First, let’s look at what makes ice opaque. In no particular order:
- Impurities – dirt, etc.
- Dissolved salts and other minerals
- Bubbles
- Compression fractures
To avoid the first two, use filtered water. We use tap water run through a reverse osmosis filter. The last two are harder. To control bubble formation and fractures, you need to control the speed, direction and time of freezing.
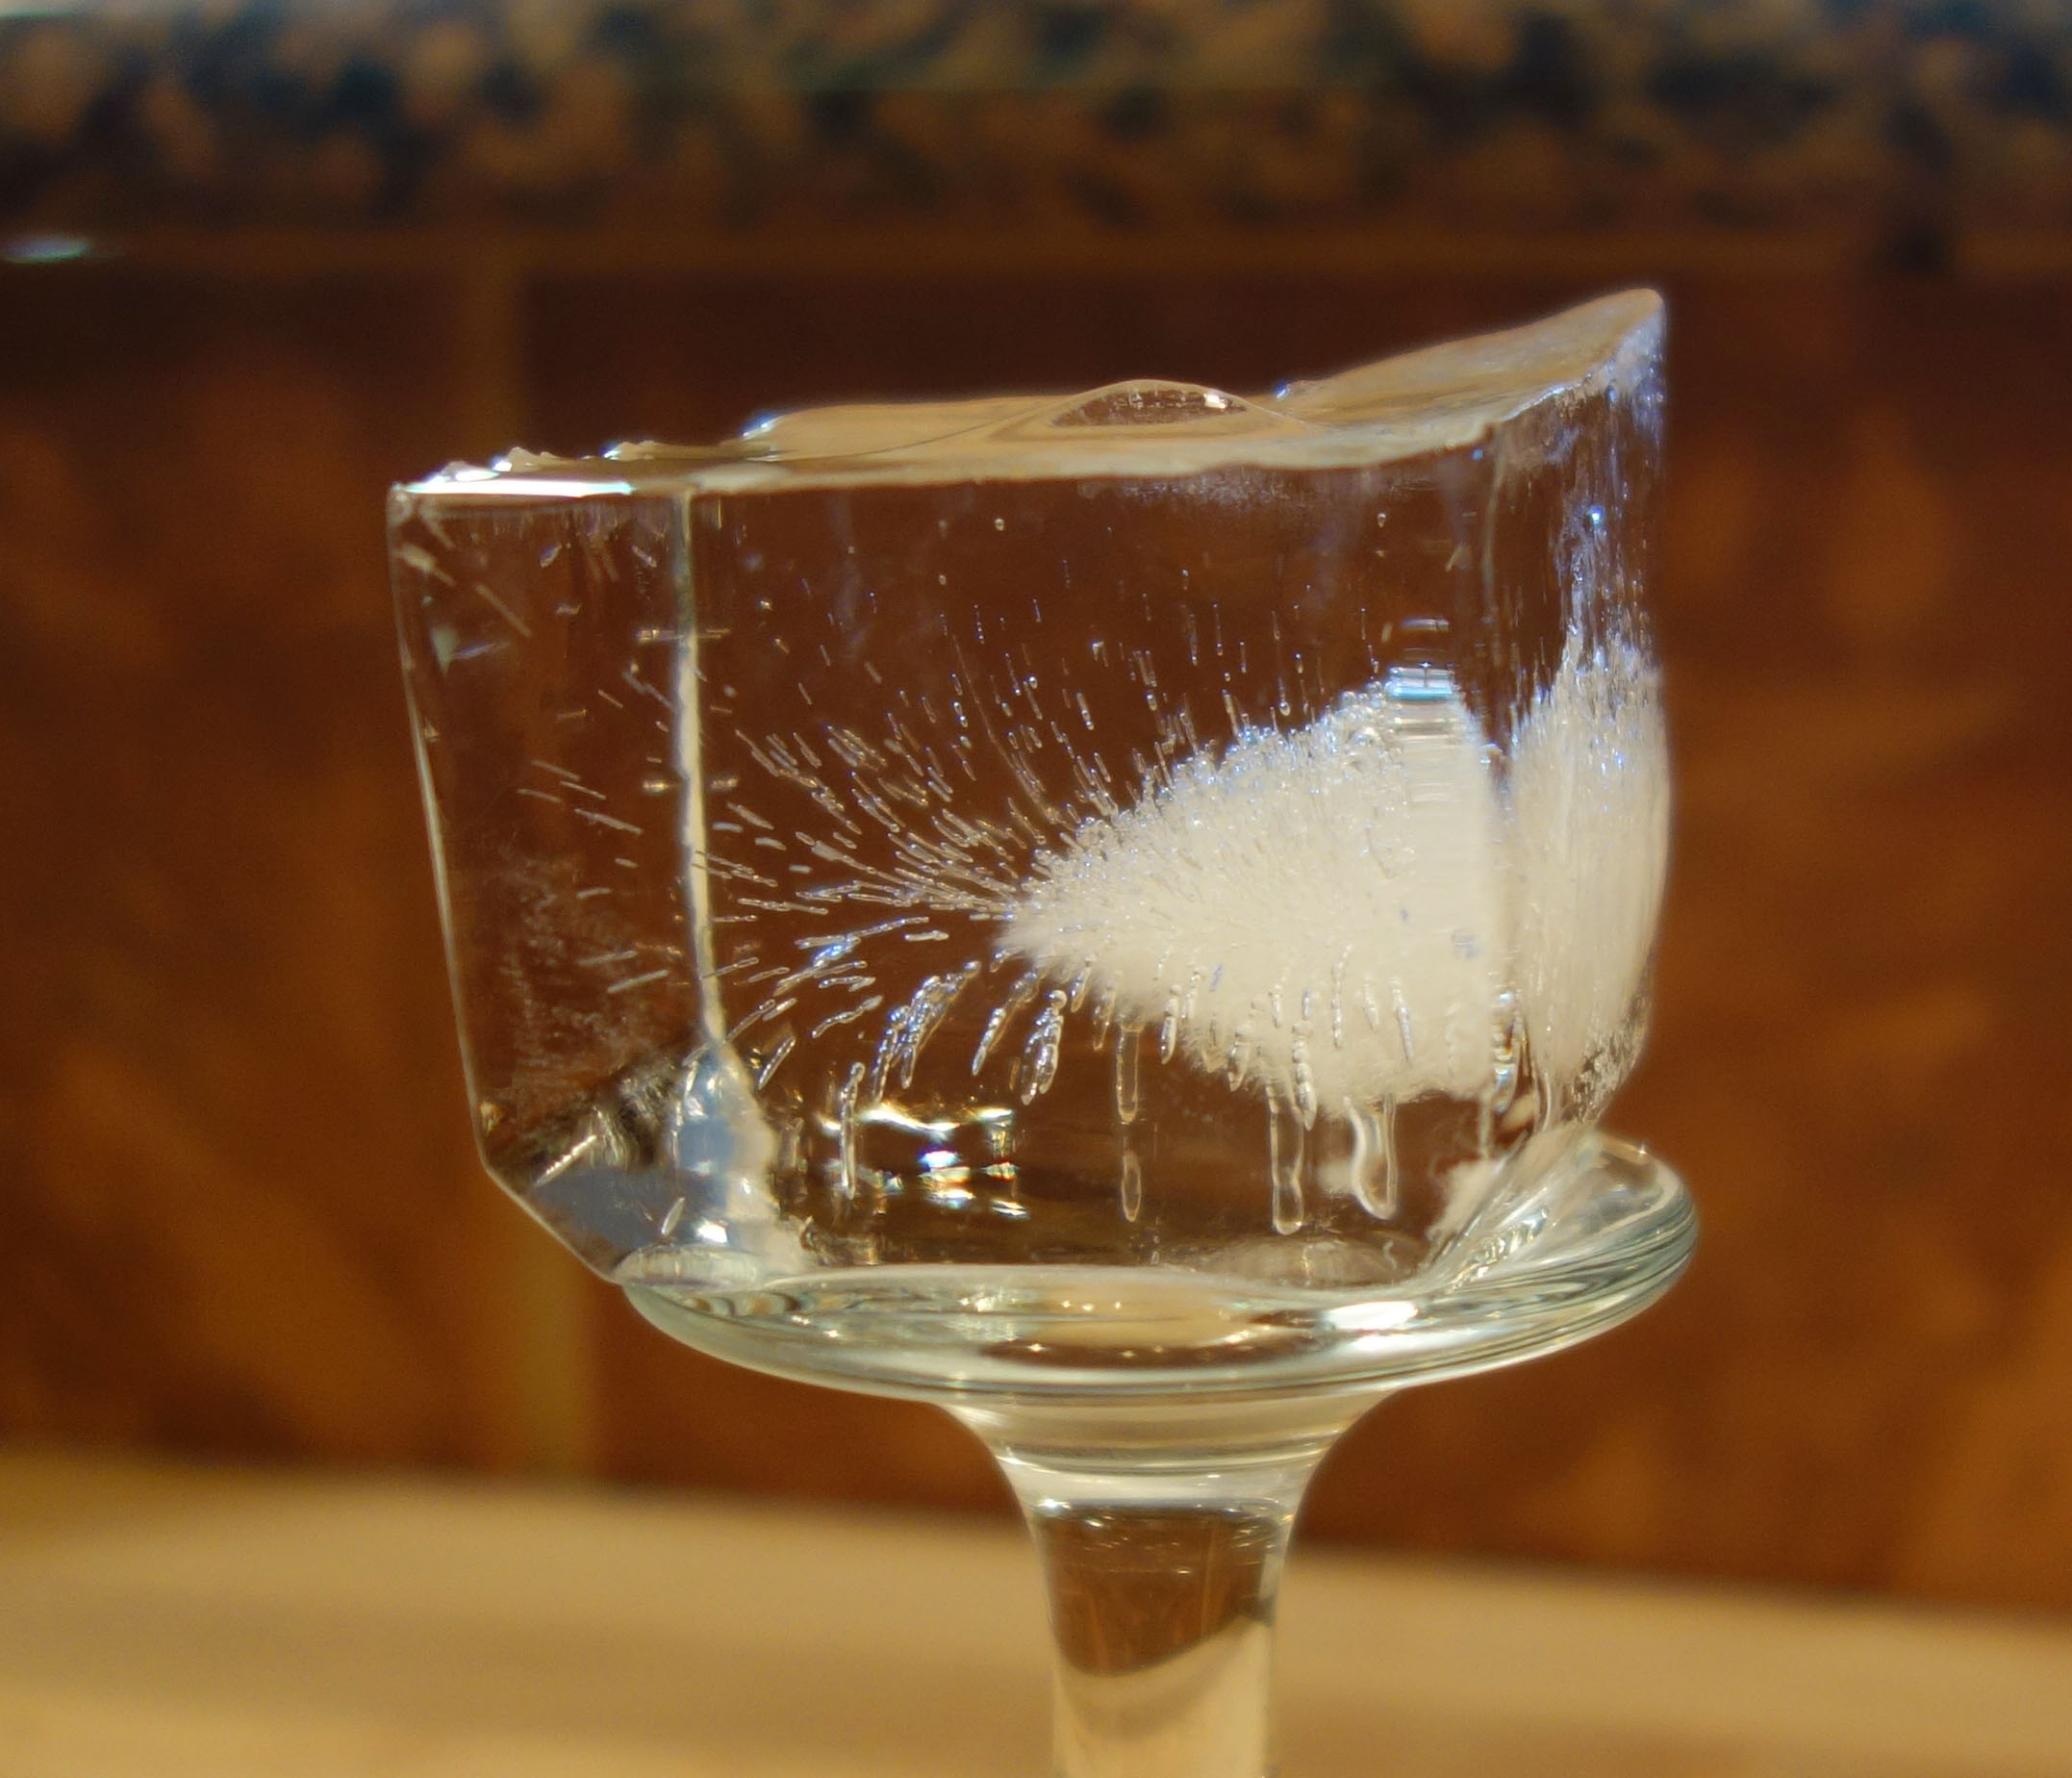
This cube was frozen in the center of a 6 cube tray. It froze from the side (left), top and bottom. You can see that the fractures and bubbles formed where the ice began to meet.
Bubbles form because air is forced out of solution when the water forms ice crystals. As the water freezes, air will come out of solution and become trapped in the ice. The more slowly the water is forming ice crystals, the less likely air will become trapped in the ice. So for bubbles, speed of freezing is the key. As long as there is free water next to the freezing water, the air will move into the free water and away from the ice crystals.
Compression fractures are caused by ice expanding as it freezes. If the water is freezing from one direction, it will remain clear. When the freezing ice meets the bottom of the container, or ice freezing from another direction, it will fracture.
So to make clear ice:
- Use filtered water – removes impurities and dissolved minerals
- Freeze it from one direction – prevents fracturing
- Avoid freezing it quickly – reduces bubbles
- Stop it before it freezes to the bottom of the container – reduces bubbles and fractures
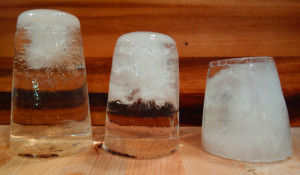
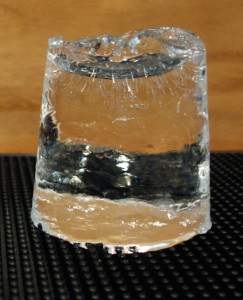
These 3 pieces of ice are sitting top down. All used filtered water. Left: there was a small amount of unfrozen water in the bottom. Fractures and bubbles had started to form. There is plenty of usable clear ice in this piece. Center: the ice has frozen to the bottom. Fractures take up half of the ice. Right: this piece froze from all directions and is heavily fractured.
To freeze from one direction, put the water in an insulated container without a lid into your freezer. The closer the temperature of your freezer is to 32⁰F (0⁰C), the slower your ice will freeze. And the faster your food will spoil. Since we also like to eat, and I don’t feel like having a dedicated freezer to make clear ice, I just pressed on at -6⁰F.
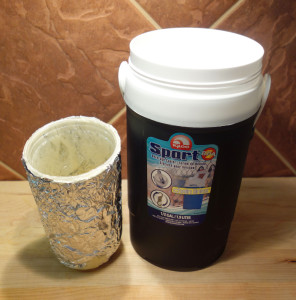
The 1/2 Gal. Cooler and the Cup/Foam/Foil assembly that fits inside
Here is how I solved the insulated container. On the internet, you can find instructions for using spray foam insulation on a cup to make a cup sized piece of clear ice. The problem I have with this is that the foam insulation is not food safe and gives off noxious fumes. So, I limited its use. Instead, I purchased an Igloo ½ Gal. cooler with a screw on lid and some Hefty disposable clear 24 oz. cups. The disposable cup did not quite fit snugly into the bottom of the cooler. This meant that cold air would surround the cup allowing the ice to freeze from multiple directions.
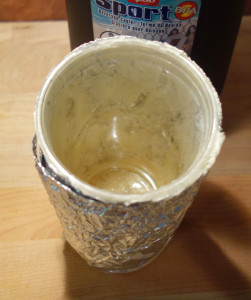
Here you can see through the plastic that the foam is now near the top of the cup.
To prevent this, I lined the bottom of the cooler with aluminum foil, (plastic wrap would be better, but I couldn’t get it to stay down in the bottom). I then put about 3 inches of spray foam insulation into the bottom of the foil lined cooler and shoved 1 Hefty cup down into the foam. Looking through the clear plastic, I could see gaps in the foam near the top of the cup. I carefully removed the foil, foam and cup and gently squirted additional foam between the foil and the plastic. I then put it all back into the cooler. This was allowed to dry for 24 hours. I again pulled out the foil, cup and insulation and trimmed the excess foil and insulation from the top of the cup. The plastic cup now fit snugly into the cooler and my contraption was ready for use.
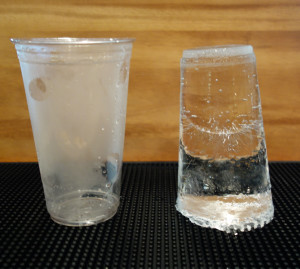
A clear ice plug next to its Hefty cup. It is sitting top down. You can see the freeze line in the center. The bottom and lower sides of the cup had begun to freeze.
Since I refuse to raise the temperature of our freezer, I found that the ice still froze to the bottom of the container too quickly. It was not frozen enough overnight, but was frozen to the bottom before I got home from work. My solution was to first pour very hot water into the cooler and let it sit for 5 minutes. I then drained and dried the cooler and pushed my cup/foil/insulation assembly into the bottom. Next, a single clean Hefty cup was filled with filtered water and set down into the cup/foil/insulation assembly in the bottom of the warm cooler.
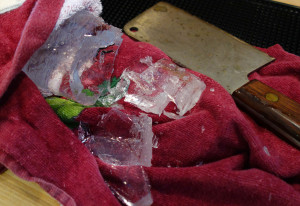
To remove the partially frozen bottom, hold the ice with a towel and tap it with a heavy knife.
This set up froze the water nearly to the bottom in 22 hours. I broke the bottom of the ice to remove a small amount of water, and then saved the ice in the freezer in a plastic bag. This ice “plug” can be used to make an ice sphere or a large ice cube. Of course, as you can see in the above video, the ice plug can shatter even if you allow it to temper before shaping.
Clear ice plug ready to shape. Always allow the ice to ‘temper’ – let the surface warm to room temperature. The ice will then appear clear rather than frosty. Otherwise, it is more likely to fracture when you shape it.
Clear ice sphere that shattered in the ice sphere maker, even though it was tempered. These fracture lines are on the surface and disappear quickly in the drink.
Cheers!