Pumpkin Bisque Shooters
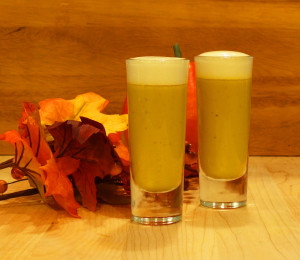
I love pumpkin and I’ve always been a fan of pumpkin bisque. I like mine to be savory. Save the sweet for the pie! Since I have a more than passing infatuation with rum, I simply looked to combine two of my favorite flavors. I tried this warm, with bourbon and with dark rum. Not great in any combination. But cold bisque and gold rum were the perfect match. The bitter sweet flavor of the apple brandy foam is perfect with the savory, slightly spicy pumpkin bisque.
I have included the recipe for my pumpkin bisque below, but you can use your own or even your favorite prepared brand.
For 2 Shooters:
- 2 oz. Cold Pumpkin Bisque – see below
- 1/2 oz. Gold rum such as Cruzan or Mount Gay
- 1 dash Simple syrup
- 1 Dash Angostura Bitters
- Apple Brandy Foam – see below
- Combine pumpkin bisque,rum simple syrup and bitters in a mixing glass without ice and stir to combine.
- Divide between 2 tall shooters
- Gently float the Apple Brandy Foam on the shooters
- Serve immediately
Apple Brandy Foam
- 3 egg whites (4 1/2 oz pasteurized egg whites)
- 3 oz. Applejack Brandy
- 2 oz. Fresh Orange juice – double strained
- 2 Dashes Bar Keep Apple Bitters
- Add all ingredients to an iSi Whipper
- Seal the whipper and shake to further break up the egg whites
- Double charge the Whipper with N2O, shaking after each charge
- Refrigerate for 2 hours before use. Will keep refrigerated for a few days.
Pumpkin Bisque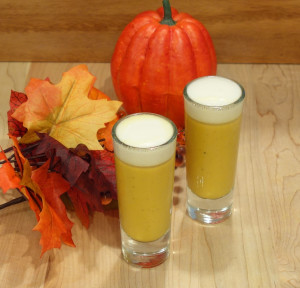
- 1 tsp Cayenne
- 2 Cups Diced Onion
- 2 cloves Chopped Garlic
- 1 1/2 Tbls. Butter
- 1 – 15 oz. Can Pumpkin Puree
- 4 Cups Chicken Stock
- 1/4 tsp. Ground Allspice
- 1/2 tsp Fresh ground black pepper
- 1/4 tsp. Salt to Taste
- 1/4 Cup Dry Sherry
- 1 Cup Heavy Cream
- Saute the onions in the butter until translucent – about 3 minutes. Add the garlic and cook 30 sec.
- Add the rest of the ingredients except the cream and simmer for 30 min
- Place the mixture in a blender and puree until smooth.
- Return the puree to the pot, add the cream and continue to cook until heated through.
- Serve immediately or cool for the above shooters.
Cheers!


