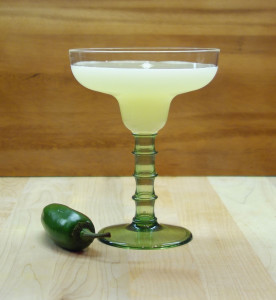
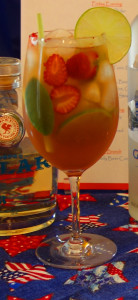
This margarita is a new favorite because of its subtle taste of jalapeño with the slightest bit of heat on the finish. It was popular at our last party…and we knew we had a hit when the rest of the cocktails went untouched! The simple syrup takes only a few minutes to make, but does require time to cool. So plan ahead!
The Jalapeño Margarita
2 oz. Premium plata tequila such as Milagro
2 1/2 oz. Fresh lime juice
2-3 slices of fresh jalapeño – seeds removed
1 1/2 oz Jalapeño Simple Syrup – see below
1/4 oz. Cointreau or triple sec
Chill a margarita glass with ice and water
Add the lime juice and jalapeño slices to a shaker and muddle
Add the remaining ingredients with ice and shake to chill – about 15-20 sec.
Double strain into chilled glass
You can rim the glass with salt and/or garnish with a lime if you wish
For a frozen variety – see below
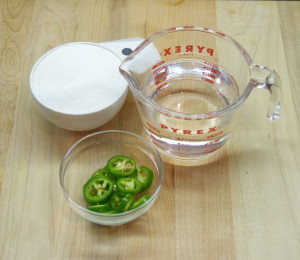
Jalapeño Simple Syrup
1 cup water
1 cup sugar
1 jalapeño stemmed and coarsely chopped
Combine all ingredients in a small sauce pan and bring to a boil over med-low heat.
Reduce heat and simmer gently for 10 minutes (be careful, sometimes this will foam up and boil over)
Remove from heat and allow to cool
Strain into a jar, bottle or squeeze bottle and store refrigerated – it will keep a couple of weeks.
Frozen Jalapeño Margarita
Chill a margarita glass with ice and water
Add the lime juice and jalapeño slices to a mixing glass and muddle
Double strain the lime juice into your blender
Add the remaining ingredients along with 8 – 10 oz. ice
Whir it up and serve in your chilled glass
Cheers!
Mélange d’Or
I enjoy gin drinks and bitter drinks. I also appreciate cocktails that are herbal and complex. The Mélange d’Or combines the flavors of Hendrik’s Gin, Carpano Blanco, Carpano Dry and Tempus Fugit’s Kina L Avion d’Or. Then I threw in Dale DeGroff’s Pimento Aromatic Bitters for an additional level of complexity.
Combine all of the ingredients, except the garnish, with ice in a mixing glass. Stir to chill
Strain into chilled cocktail glass
Garnish and serve
Cheers!
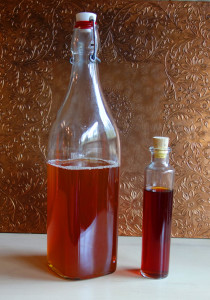
Tonic Syrup: for Gin, Vodka or Rum and Tonics
Making tonic water at home and in bars became a widespread fashion in the early 2000’s. An internet search for ‘DIY tonic water’ will result in a number of recipes. Jeffrey Morgenthaler posted a recipe in 2008, (found here), which became one of the most popular. Since then, he has published a newer version in his book, The Bar Book: Elements of Cocktail Technique. I like his new version, which can be found on line here, because he separates the aromatics from the quinine. This lends itself to easy modification. My recipe for tonic syrup for use with gin differs only slightly from his.
What has become apparent over the last decade is that
Making tonic water at home is dangerous!
Tonic water is primarily carbonated water and quinine. Quinine is most famous for treating the symptoms of malaria. Mixing gin and quinine dates to the British in various malaria prone climes where soldiers used gin to make the bitter quinine more palatable. In those days, quinine was extracted from cinchona bark in a process not unlike making tea. Since World War II, quinine has been manufactured as a white powder formed into pills. You can purchase quinine pills over the internet and dissolve them to use in tonic water. This is a bad idea. It would be very easy to poison yourself and guests with too much quinine. The recipes noted above and the ones you will find on the internet will use cinchona bark as the British did. The problem is that you can’t know how much quinine is extracted from the cinchona bark. Many people have developed cinchonism, the symptoms of quinine poisoning, from drinking DIY tonic water. These symptoms include flushed and sweaty skin, ringing in the ears, abdominal pain, nausea, vomiting, diarrhea, headaches, rash, high pitched hearing loss and dizziness. Larger doses can result in deafness, blindness, somnolence, shock, cardiac arrhythmias and death. All of these symptoms will go away when the quinine is metabolized. Well, except the death part.
These DIY tonic waters can be delicious. The problem is the quinine. So why not leave out the cinchona bark and, thus, the quinine. Make the syrup but, instead of adding carbonated water, add commercial tonic water!
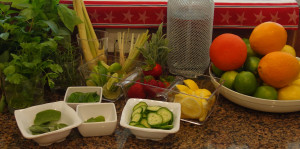
I had an opportunity to discuss Gin and Tonics with Jason Kosmas, Co-founder of The 86 Company, (Ford’s Gin among others), Co-founder of Employees Only and Co-author of Speak Easy. His take on tonic syrups is to include citrus, coriander and herbs – even herbal tea. Keep in mind that the base spirit you choose will lend itself to various flavors. As Jason pointed out – read the back label for flavor ideas. For syrup used in Rum and Tonics, he would add lime, pineapple, cinnamon and vanilla. (The rest of the interview centered on Gin Tonics and will be included in a future post)
These days, you are not limited to buying tonic water in 1 liter bottles. There are a number of premium tonic waters available such as Fever Tree and Q Tonic. The primary idea of making your own tonic syrup is to customize it for various drinks. These recipes will take about 15 minutes of active and 45 minutes of inactive time.
The only equipment you will need that is slightly out of the ordinary is a digital food or postage scale. Only the precise weight of ingredients ensures that your syrup will be consistent from one batch to the next.
For the Quinine Tincture:
We substitute Luxardo Bianco Bitters
For the aromatic syrup for gin or vodka and tonics:
20 gr. citric acid
10 gr. whole gentian root
1 gr. coriander
1 gr. Ceylon soft-stick cinnamon, broken into small pieces
30 gr. lemon peel
30 gr. grapefruit peel
400 gr. sugar
500 ml. water
2 – 3 to 4 inch sprigs of fresh lavender (optional)
1 1/2 oz Luxardo Bianco Bitters
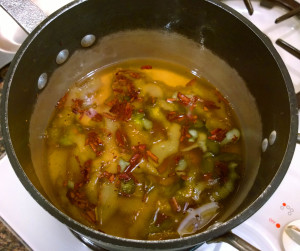
Combine all of the ingredients, except the lavender and bitters, in a sauce pan and bring to a boil.
Reduce the heat, cover and simmer for 20 minutes
Remove from the heat, add the fresh lavender and allow to cool.
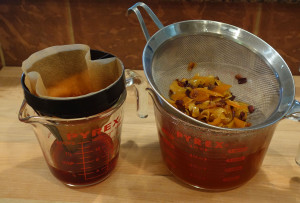
Strain through a fine mesh strainer.
Add the Luxardo Bianco Bitters and store, refrigerated, in a seal-able bottle or jar. It will keep 3-4 weeks before it turns cloudy.
For the aromatic syrup for rum and tonics:
20 gr. citric acid
10 gr. whole gentian root
1 gr. Star Anise
2 gr. Ceylon soft-stick cinnamon, broken into small pieces
3 Kaffir Lime leaves (Optional – available at Asian Markets)
10 gr. lemon peel
50 gr. Lime peel
400 gr. Turbinado sugar
500 ml. water
1 1/2 oz Luxardo Bianco Bitters
Combine all of the ingredients, except the bitters, in a sauce pan and bring to a boil.
Reduce the heat, cover and simmer for 20 minutes
Remove from the heat and allow to cool.
Strain through a fine mesh strainer.
Add the Luxardo Bianco Bitters and store, refrigerated, in a seal-able bottle or jar. It will keep 3-4 weeks before it turns cloudy.
Gin, Rum or Vodka Tonics
2 oz Spirit – either Gin, Rum or Vodka
2 oz. Tonic Syrup
6 oz. Tonic Water
Optional dash of simple syrup for gin or vodka/demerara simple syrup for rum
Garnish – see below
Rum & Tonic
Method #1
Add large ice cubes to a large, stemmed wine glass
Add garnishes except for any citrus peels for expressing
Add your Spirit of choice
Slowly add the Tonic Syrup followed by the tonic water.
Express any citrus peels and serve
Method #2
Fill your large wine glass with large ice and garnish
Add the remaining ingredients to a mixing glass with ice and stir
Strain into your prepared glass
Express any citrus peels and serve
Suggested Garnishes:
You should let your imagination run with the garnishes.
Gin or Vodka
Lemon & Lime Wheels
Lemon & Lime Peels
Grapefruit Peels
Sliced Berries
Cucumber Slices
Fresh Lavendar
Fresh Rosemary
Fresh Sage
Kaffir Lime Leaves
Lemon Grass
Rum
Lemon & Lime Wheels
Lemon & Lime Peels
Sliced Berries
Kaffir Lime Leaves
Fresh Cilantro
Fresh Pineapple
Corriander
Fresh Hibiscus Flowers
Lemon Grass
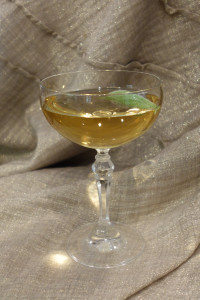
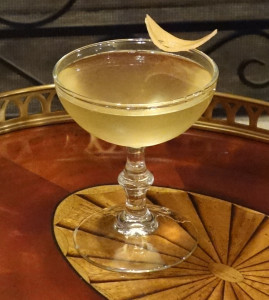
G-n-Tini
Here is a cocktail that uses Tonic Syrup directly in the drink.
1 1/2 oz. Fords Gin
1/2 oz. Dolin Sweet Vermouth
1/2 oz. Tonic Syrup for Gin
Grapefruit peel for garnish
Stir the first three ingredients in a mixing glass with ice to chill
Strain into a chilled coup
Express the grapefruit peel over the drink and float the peel
Cheers!
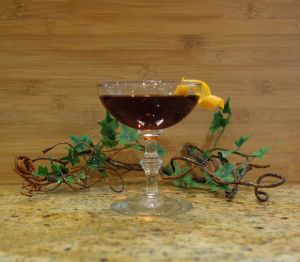
Green Brier Grin
I met the Nelson brothers, of Nelson’s Green Brier Distillery, at this year’s San Antonio Cocktail Conference and visited with them again at TOTC. Their Belle Meade Bourbon is one of my favorites and with it I have created a number of cocktails. I first tasted their Nelson’s Green Brier Tennessee White Whiskey* at the San Antonio Cocktail Conference. It is single distilled from a mash of corn, barley and wheat which gives it some subtle, but distinct differences from other premium white whiskeys. First, I think Nelson’s Green Brier is slightly sweeter and has a malty/chocolate note. Still present is the ‘bite’ you would expect from white whiskey. Previously, I was not a fan of white whiskey, but liking theirs, I have set out to design some cocktails using Nelson’s Green Brier Tennessee White Whiskey.
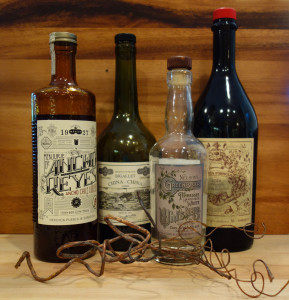
I may have just had chocolate on the brain, or maybe it was molé, but the chocolate note I mentioned made me think of chilies and thus Ancho Reyes liqueur. Add in Carpano Antica Vermouth and now it becomes something rich and complex. Being determined to gild the lily, I wanted to push the herbal flavors of the vermouth. So, I got esoteric and added Bigallet’s China-China Amer. The Carpano has wonderful essences of dried fruits and bitter marmalade along with a little cocoa and red wine. All of which are enhanced by the China-China’s orange peels and bittering herbs bringing a little truffle like earthiness to the party. This combination complements rather than overwhelms or conceals the unique flavors of this white whiskey. Here’s the recipe that makes me smile!
Green Brier Grin
1 1/2 oz. Nelson’s Green Brier Tennessee White Whiskey
3/4 oz. Carpano Antica
1/2 oz. Ancho Reyes
1/2 oz. Bigallet’s China-China Amer
Chill a cocktail glass with ice and water
Add all ingredients, except the garnish, to a mixing glass with ice. Stir to chill.
Strain into chilled cocktail glass
Cheers!
* Doc Elliott’s Mixology receives no compensation for brands mentioned.
MxMo C
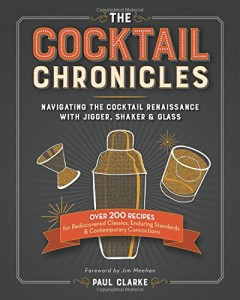
I’m a relative new comer to Mixology Monday, having contributed for only about a year. So my twelve entries are a modest offering when one considers that this monthly online cocktail party is now 100 months old! This month’s theme comes from MxMo’s dedicated leader Frederic Yarm at the cocktail virgin slut. It is “Cocktail Chronicles” and is a tribute to Mixology Monday’s founder Paul Clarke. Paul has written at the Cocktail Chronicles blog since 2005, and has now authored a book The Cocktail Chronicles: Navigating the Cocktail Renaissance with Jigger, Shaker & Glass. The book is an insider’s look at the cocktail “revolution” of the past decade. While it is not really a history, it does give insight into where we were and where we are today. He also highlights the classic yet simple cocktails that form the backbone of what we call “mixology.”
The theme, “Cocktail Chronicles” for this month’s Mixology Monday is, as described in the announcement post, “what is timeless (or potentially timeless) and elegant in its simplicity.” Wonderful yet uncomplicated. I have interpreted this to mean, “highlight a cocktail that is an essential part of the current cocktail renaissance.”
In selecting our contribution for this month, I have focused on “timeless,” “simple” and “malleability,” (a cocktail that can easily be made into something else). In our focus on home entertainment, these three criteria: elegant, simple and easily modified are huge. Cocktails that have these qualities enable the host to entertain with ease.
I think that a cocktail that has been around for 200 years meets the “timeless” threshold, and if it has three ingredients, it qualifies as “simple.” Now if that cocktail can be, and has been, easily turned into a myriad of famous drinks, it’s a winner. So I have selected the Sour: spirit, juice and sweetener. The Sour has been around since at least the early 1800’s, (check the sidebar for a brief history of the Sour), and it is the forbear of numerous cocktails. From the humble Whiskey Sour has come Daiquiris, Margaritas, the Sidecar, The Aviation, the Pisco Sour, Ward Eight, the Cosmopolitan and many more.
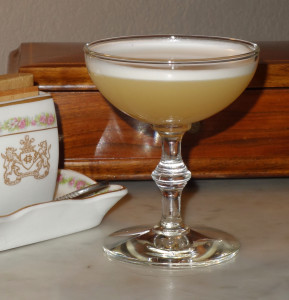
One of my favorite Whiskey Sours is our Belle Meade Sour. It does not follow the usual Sour Ratio of 2:1:1, (Spirit:Sour:Sweet), but I like my whiskey sours 1:1 bourbon and lemon sour. For the lemon sour, I prefer 2:1 lemon to simple syrup. This makes the ratio more like 2:1:2/3 or so. I also like the mouth feel of egg white. So here is our recipe:
1 1/2 oz. Belle Meade Bourbon
1 oz. Fresh lemon juice
1/2 oz. Simple syrup
1 large egg white (can use 3 Tbl. pasteurized egg whites but it will not be the same)
Add all ingredients, in order to a shaker and shake for 30 sec without ice to emulsify the egg white.
Add 3 regular sized ice cubes plus one large cube (1 1/2 – 2 inches)* to the shaker and shake to chill 10 – 15 sec.
Double strain into a chilled coup and serve
* using a large ice cube creates a silky finish that complements the egg white. The effect lasts for only a minute or two, so serve it quickly. You can omit this and use regular ice but you should get a large ice cube tray!
Cheers!
MxMo XCIX – Ice Baby!
MxMo XCIX – Ice Baby!
I though I’d take this opportunity to discuss my favorite toy, er, tool. The ice sphere maker.
Making Clear Ice at Home
Mixology Monday
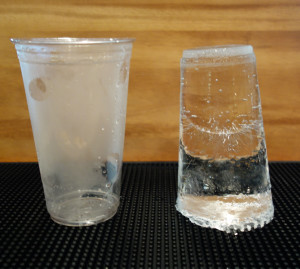
Bottom line, a lot of trouble for little reward. You can easily make clear ice in small quantities. But for entertaining, it’s not practical. I know that in San Antonio, we can purchase large, clear ice cubes for as little as 35₵ each. Nevertheless, if you want something for a small, intimate occasion, here’s a fairly simple method.
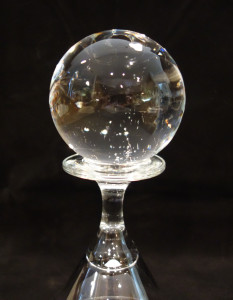
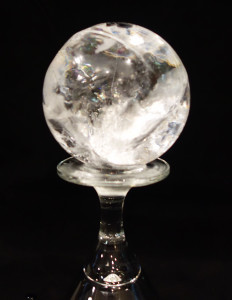
Other than a few bubbles in the bottom, this is a clear ice sphere.
First, let’s look at what makes ice opaque. In no particular order:
Impurities – dirt, etc.
Dissolved salts and other minerals
Bubbles
Compression fractures
To avoid the first two, use filtered water. We use tap water run through a reverse osmosis filter. The last two are harder. To control bubble formation and fractures, you need to control the speed, direction and time of freezing.
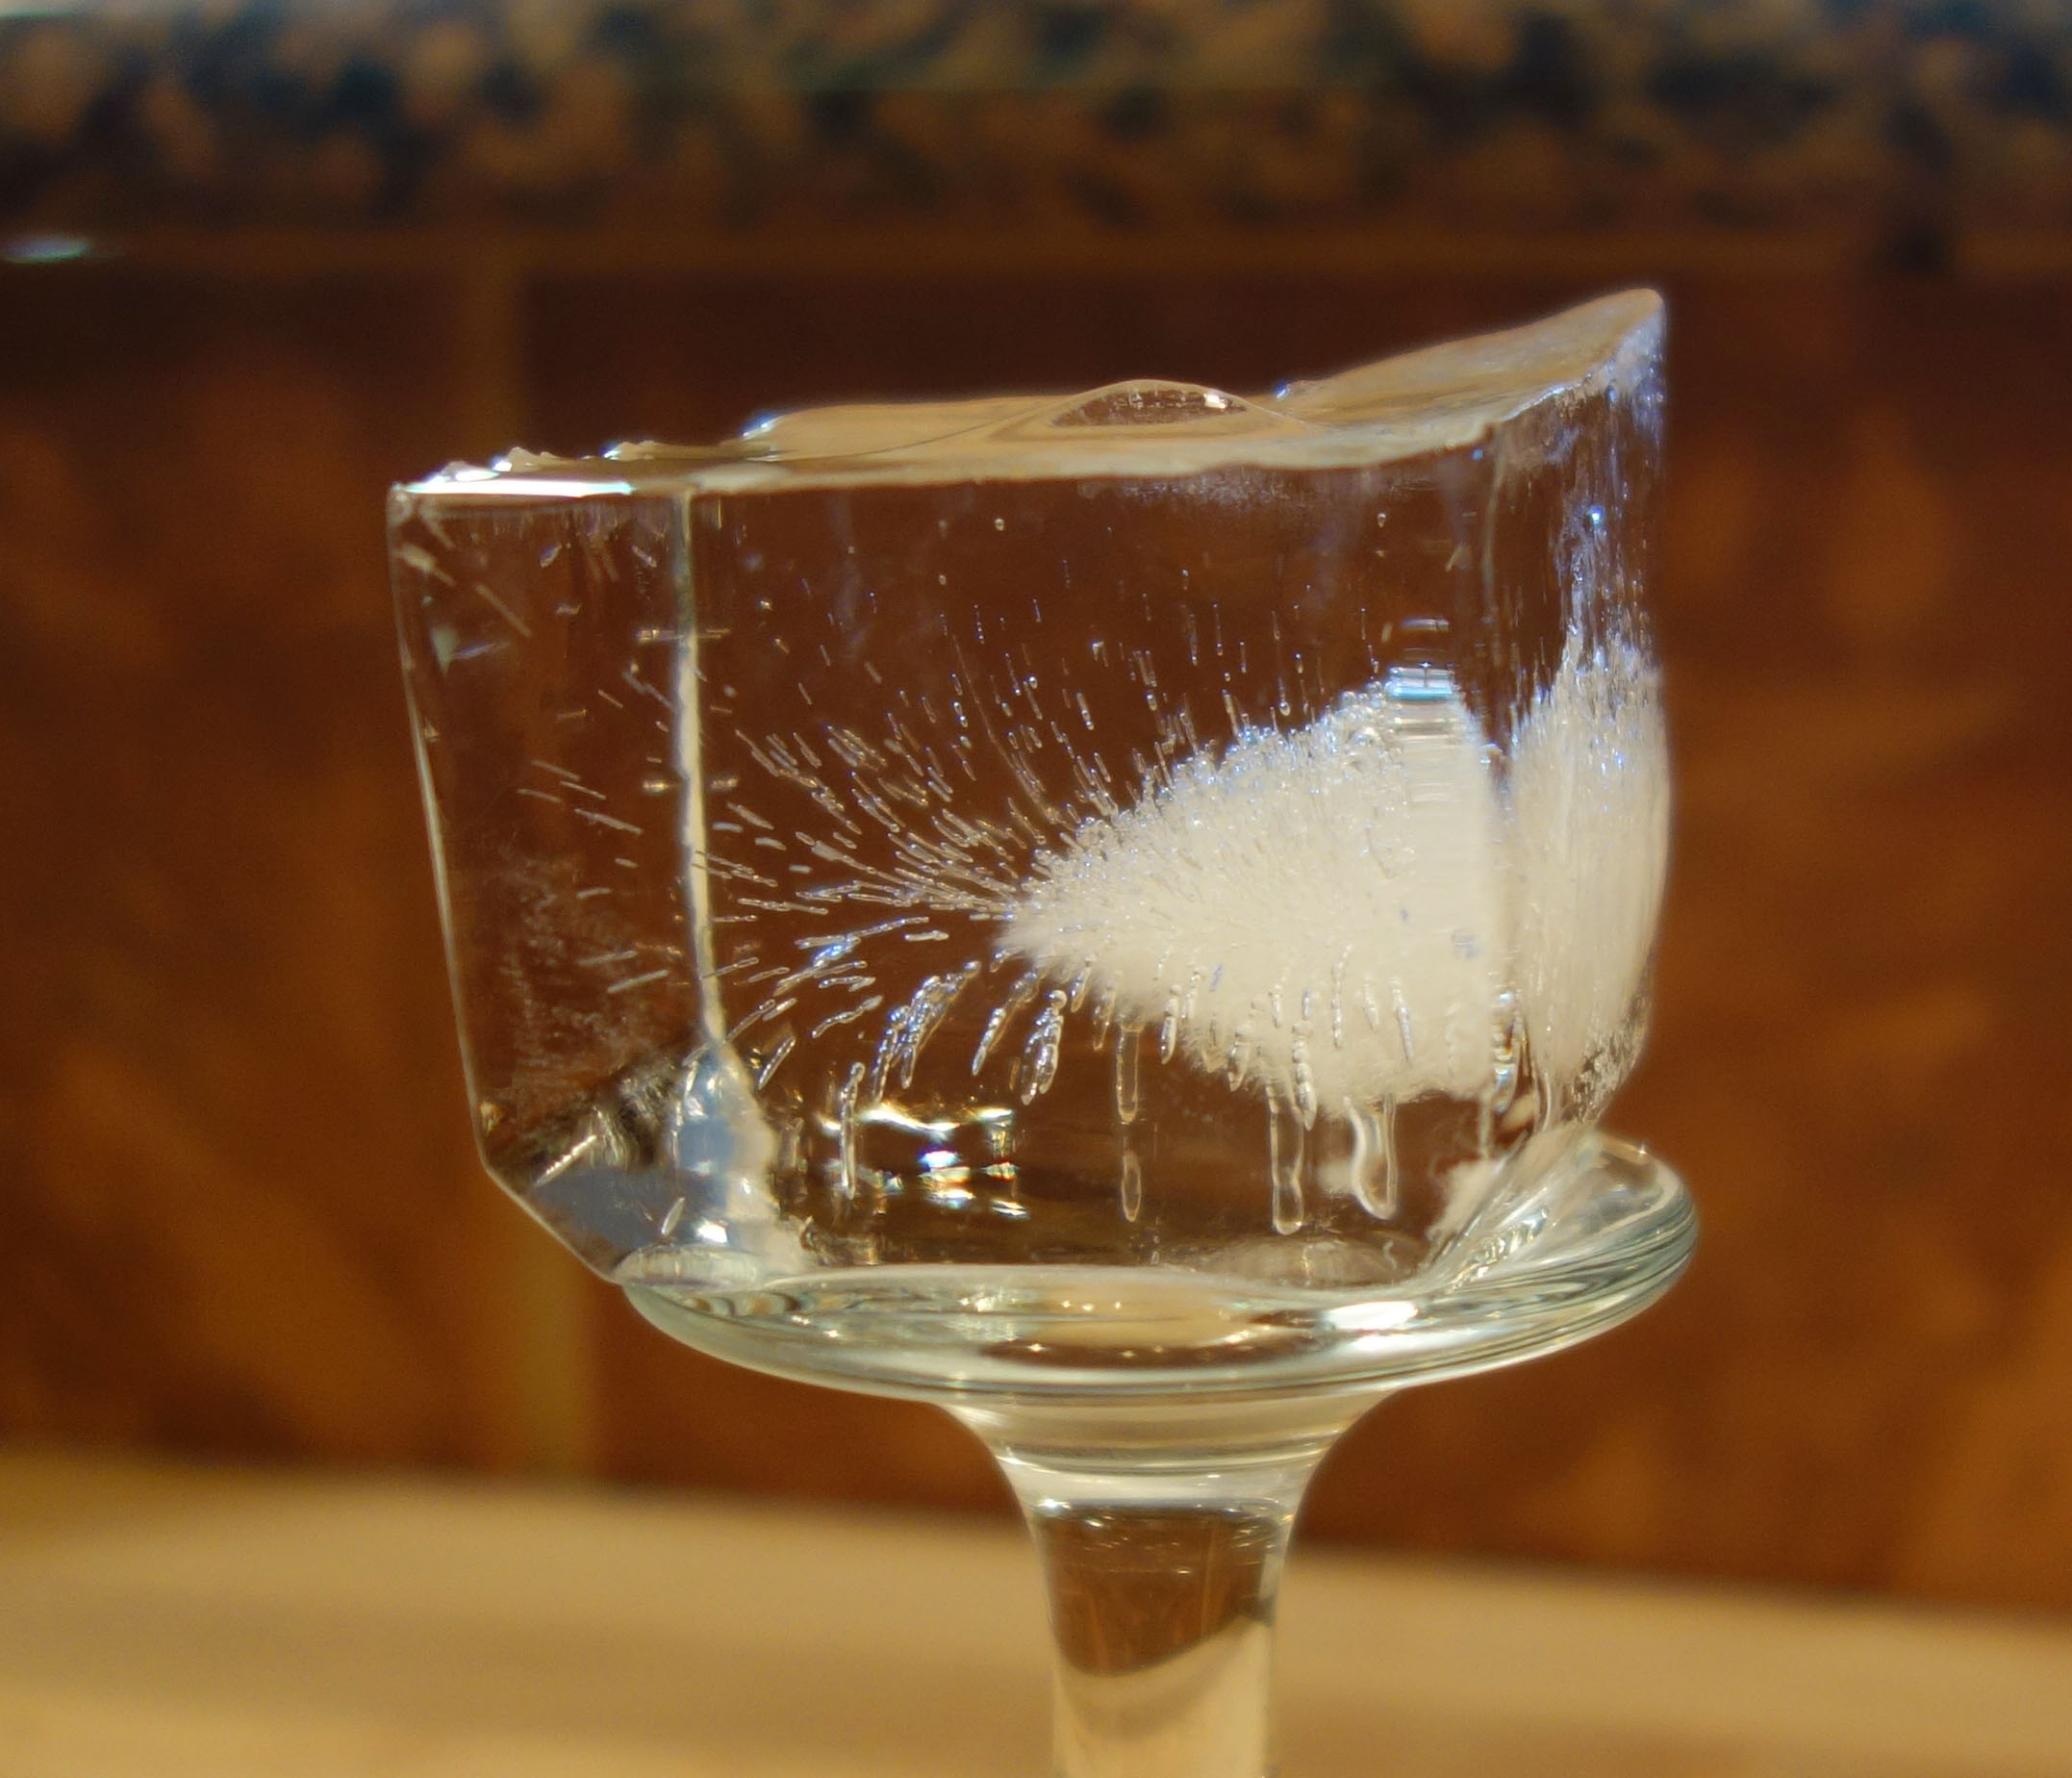
This cube was frozen in the center of a 6 cube tray. It froze from the side (left), top and bottom. You can see that the fractures and bubbles formed where the ice began to meet.
Bubbles form because air is forced out of solution when the water forms ice crystals. As the water freezes, air will come out of solution and become trapped in the ice. The more slowly the water is forming ice crystals, the less likely air will become trapped in the ice. So for bubbles, speed of freezing is the key. As long as there is free water next to the freezing water, the air will move into the free water and away from the ice crystals.
Compression fractures are caused by ice expanding as it freezes. If the water is freezing from one direction, it will remain clear. When the freezing ice meets the bottom of the container, or ice freezing from another direction, it will fracture.
So to make clear ice:
Use filtered water – removes impurities and dissolved minerals
Freeze it from one direction – prevents fracturing
Avoid freezing it quickly – reduces bubbles
Stop it before it freezes to the bottom of the container – reduces bubbles and fractures
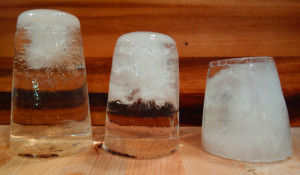
These 3 pieces of ice are sitting top down. All used filtered water. Left: there was a small amount of unfrozen water in the bottom. Fractures and bubbles had started to form. There is plenty of usable clear ice in this piece. Center: the ice has frozen to the bottom. Fractures take up half of the ice. Right: this piece froze from all directions and is heavily fractured.
To freeze from one direction, put the water in an insulated container without a lid into your freezer. The closer the temperature of your freezer is to 32⁰F (0⁰C), the slower your ice will freeze. And the faster your food will spoil. Since we also like to eat, and I don’t feel like having a dedicated freezer to make clear ice, I just pressed on at -6⁰F.
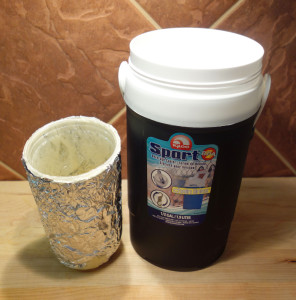
The 1/2 Gal. Cooler and the Cup/Foam/Foil assembly that fits inside
Here is how I solved the insulated container. On the internet, you can find instructions for using spray foam insulation on a cup to make a cup sized piece of clear ice. The problem I have with this is that the foam insulation is not food safe and gives off noxious fumes. So, I limited its use. Instead, I purchased an Igloo ½ Gal. cooler with a screw on lid and some Hefty disposable clear 24 oz. cups. The disposable cup did not quite fit snugly into the bottom of the cooler. This meant that cold air would surround the cup allowing the ice to freeze from multiple directions.
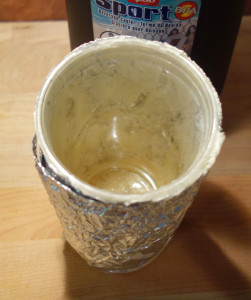
Here you can see through the plastic that the foam is now near the top of the cup.
To prevent this, I lined the bottom of the cooler with aluminum foil, (plastic wrap would be better, but I couldn’t get it to stay down in the bottom). I then put about 3 inches of spray foam insulation into the bottom of the foil lined cooler and shoved 1 Hefty cup down into the foam. Looking through the clear plastic, I could see gaps in the foam near the top of the cup. I carefully removed the foil, foam and cup and gently squirted additional foam between the foil and the plastic. I then put it all back into the cooler. This was allowed to dry for 24 hours. I again pulled out the foil, cup and insulation and trimmed the excess foil and insulation from the top of the cup. The plastic cup now fit snugly into the cooler and my contraption was ready for use.
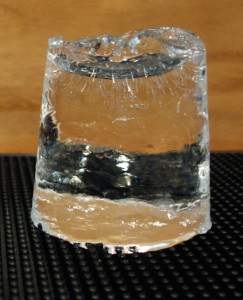
A clear ice plug next to its Hefty cup. It is sitting top down. You can see the freeze line in the center. The bottom and lower sides of the cup had begun to freeze.
Since I refuse to raise the temperature of our freezer, I found that the ice still froze to the bottom of the container too quickly. It was not frozen enough overnight, but was frozen to the bottom before I got home from work. My solution was to first pour very hot water into the cooler and let it sit for 5 minutes. I then drained and dried the cooler and pushed my cup/foil/insulation assembly into the bottom. Next, a single clean Hefty cup was filled with filtered water and set down into the cup/foil/insulation assembly in the bottom of the warm cooler.
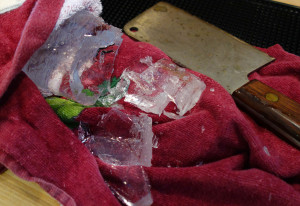
To remove the partially frozen bottom, hold the ice with a towel and tap it with a heavy knife.
This set up froze the water nearly to the bottom in 22 hours. I broke the bottom of the ice to remove a small amount of water, and then saved the ice in the freezer in a plastic bag. This ice “plug” can be used to make an ice sphere or a large ice cube. Of course, as you can see in the above video, the ice plug can shatter even if you allow it to temper before shaping.
Clear ice plug ready to shape. Always allow the ice to ‘temper’ – let the surface warm to room temperature. The ice will then appear clear rather than frosty. Otherwise, it is more likely to fracture when you shape it.
Clear ice sphere that shattered in the ice sphere maker, even though it was tempered. These fracture lines are on the surface and disappear quickly in the drink.
Cheers!
New York Sour
New York Sour
This has become one of my favorite sours. If we have a bottle of red wine open, it’s the first cocktail I consider. The egg white makes a velvety mouth feel and the large ice cube in the shaker creates a nice texture. Use a full bodied, fruity wine such as Merlot.
1 1/2 oz. Russel’s 10 Year Old Reserve Bourbon
1 oz. Fresh lemon juice
1/2 oz. Simple syrup
1 Egg white
1/4 – 1/2 oz. Red wine
Lemon peel for garnish
Add bourbon, lemon juice, simple syrup and the egg white to a shaker and shake, without ice, for 30 seconds to break up the egg white.
Add 3 regular ice cubes plus one large cube * to the shaker and shake for 10-15 seconds until well chilled.
Double strain into a chilled coup
Using the back of your bar spoon, float the wine on the drink.
Express the lemon oils from the peel over the drink and discard the peel.
* Use a 1 1/2 – 2 inch cube plus 3 regular cubes or you can just use all regular cubes.
Cheers!
Belle Meade Sour
I like my whiskey sours 1:1 bourbon and lemon sour. For the lemon sour, I prefer 2:1 lemon to simple syrup. I also like the mouth feel of egg white.
1 1/2 oz. Belle Meade Bourbon
1 oz. Fresh lemon juice
1/2 oz. Simple syrup
1 large egg white (can use 3 Tbl. pasteurized egg whites but it will not be the same)
Add all ingredients, in order to a shaker and shake for 30 sec without ice to emulsify the egg white.
Add 3 regular sized ice cubes plus one large cube (1 1/2 – 2 inches)* to the shaker and shake to chill 10 – 15 sec.
Double strain into a chilled coup and serve
* using a large ice cube creates a silky finish that complements the egg white. You can omit this and use regular ice but you should get a large ice cube tray!
Cheers!
The Wellington
The Wellington
Treaty Oak Distilling is aging their gin in whiskey barrels to create their Waterloo Antique Gin. This is truly a unique gin. It has the sweet caramel nose that you would expect from the barrel aging but with the addition of the herbaceous input of gin. The flavors are citrus, spice and herbs with a finish of charred oak that is long and smooth. We combined this with Italian vermouth and Amaro.
1 1/2 oz. Waterloo Antique Gin
1/2 oz. Carpano Antica Vermouth
1/4 oz. Averna Amaro
Lemon peel for garnish
Stir the first three ingredients in a mixing glass with ice to chill
Strain into a chilled coup
Express the lemon peel over the drink and float the peel
Cheers!
G-n-Tini
I think that Fords Gin cries out for grapefruit. It so happens that grapefruit is one of the primary flavors in Jeffrey Morgenthaler’s tonic recipe. His quinine syrup, that you can add to club soda to make tonic water, is simple and takes less than an hour to make. I thought that including the quinine syrup directly with the drink would make an interesting bitter sweet addition. I believe I was correct! Here’s the recipe:
 I had an opportunity to discuss Gin and Tonics with Jason Kosmas, Co-founder of The 86 Company, (Ford’s Gin among others), Co-founder of Employees Only and Co-author of
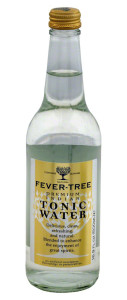
 These days, you are not limited to buying tonic water in 1 liter bottles. There are a number of premium tonic waters available such as Fever Tree and Q Tonic. The primary idea of making your own tonic syrup is to customize it for various drinks. These recipes will take about 15 minutes of active and 45 minutes of inactive time.
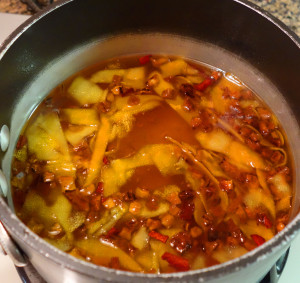
 I met the Nelson brothers, of Nelson’s Green Brier Distillery, at this year’s San Antonio Cocktail Conference and visited with them again at TOTC. Their Belle Meade Bourbon is one of my favorites and with it I have created a number of cocktails. I first tasted their Nelson’s Green Brier Tennessee White Whiskey* at the San Antonio Cocktail Conference. It is single distilled from a mash of corn, barley and wheat which gives it some subtle, but distinct differences from other premium white whiskeys. First, I think Nelson’s Green Brier is slightly sweeter and has a malty/chocolate note. Still present is the ‘bite’ you would expect from white whiskey. Previously, I was not a fan of white whiskey, but liking theirs, I have set out to design some cocktails using Nelson’s Green Brier Tennessee White Whiskey.